
Table Snip
Capture a full table out of a PDF or scan into rows and columns, preserving headers.
Table Snip captures an entire table from a document - headers, rows, and columns - and writes it into your sheet as a real table, not a wall of text.
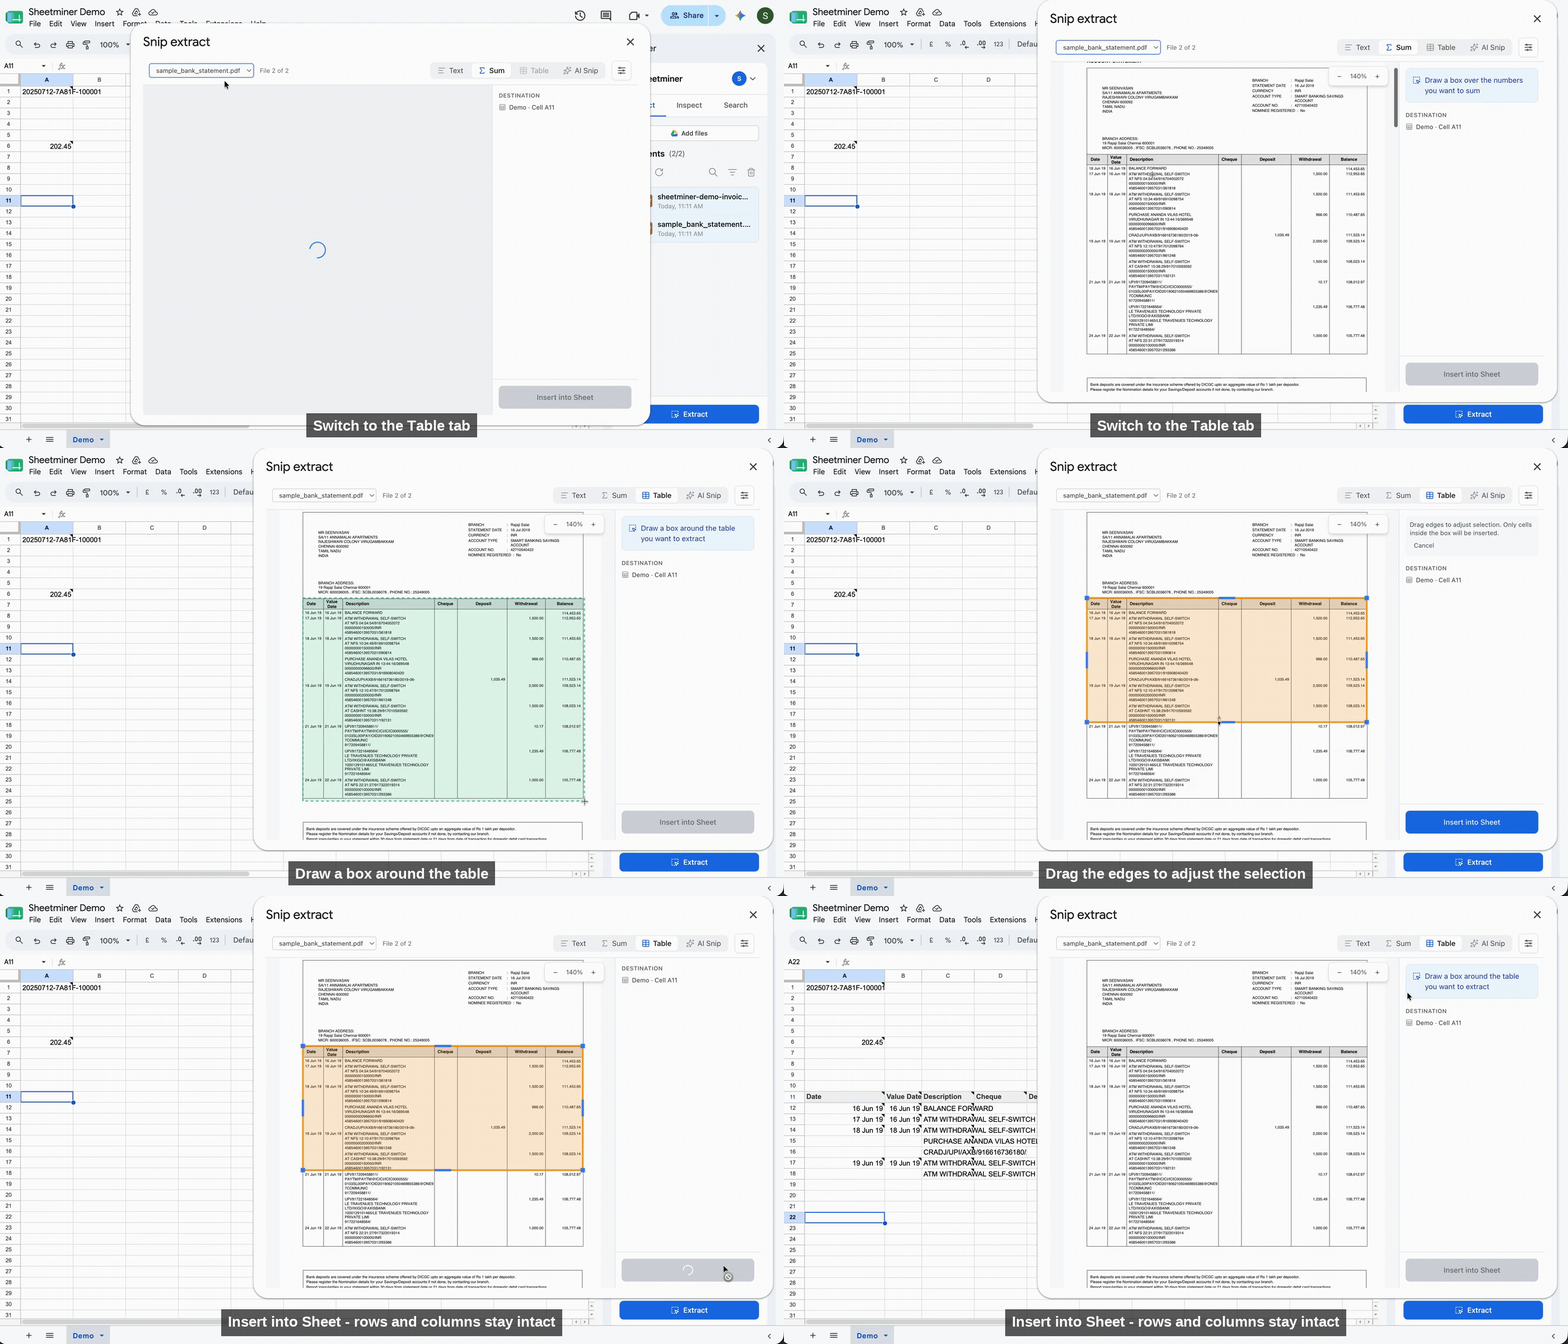
Table Snip: capture a full table in one box.
How to use it
- Select the destination cell (this becomes the top-left corner of the inserted table).
- Click Extract, then switch to the Table tab.
- Draw a box around the table in the document preview. Sheetminer shows resize handles on the box so you can nudge the edges in or out - only cells fully inside the box are included, so pull the edges in if you’re picking up part of a neighbouring column.
- Click Insert into Sheet.
What gets preserved
Table Snip keeps the table’s structure: column headers land in the top row of the inserted range, and each row of the source table becomes a row in the sheet, with values placed in the matching column. This works for standard tables like bank statement transaction lists, invoice line items, and multi-column schedules.
Processing time
Table Snip does more work per extraction than Text or Sum Snip, since it has to detect the table’s structure as well as read every cell. On longer tables or lower-quality scans, insertion can take a little longer - the Insert into Sheet button shows a loading state while it processes. If nothing has landed after a while, close and reopen the Snip extract window and try again; the second attempt is usually much faster since the document is already processed.
Source link
Each inserted row keeps its link back to the source table, so any cell in the result can be checked with Inspect.